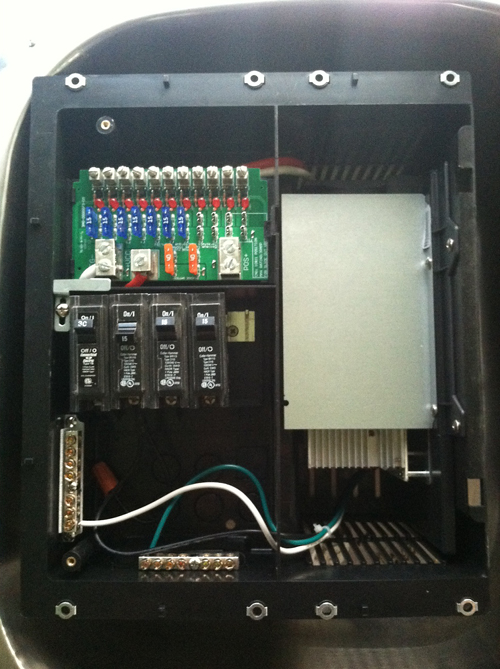
Here is the breaker panel that will charge our batteries and distribute AC and DC power
After a lot of learning and work, here is Ryan testing out the fluorescent lights that go above the presentation counter for the first time.

Original lights

With cover off (showing the original bulb and dirt)


In order to install the LED the original light socket was cut off (it's hard to make a careful cut and take a picture at the same time...)

In there was placed an aluminum plate


And we here is the result - a nicely glowing LED, it covered with the original cover and the Bus lit up by 5 of these puppies (here I must say that iPhone is no good for low-lights photography because it does look a lot brighter to the eye, but You, my dear reader, will just have to catch us on the road and see for Yourself)


The photos did not include the peculiar moment of intense efforts when we had to fish a wire through the side of the bus under some unknown wires and under some unseen ledges. You see, as it happens, there were a total of 10 dome lights being controlled by 2 switches by the driver. The unfortunate thing was that they were wired so that one switch controlled three lights on each side while the other switch controlled the other two, so, if not all the light was needed, every other one could go on and there was even a choice to tn on 6 or 4 lights. As nifty as that configuration was it did present us with a wiring dilemma. Not only did we want to preserve the lights in the front half of the Bus, but no effort was spared to put the white light in the darkroom into the same fixtures as well. Of course, we had to separate the darkroom lights from the front circuit and somehow connect them. That activity involved a good amount of poking a stiff wire through the light fixture opening in hopes of getting 5 feet of wire through to the next hole. It was not easy. Gillig has a roll-over bar that runs all around the body. Though we know it's there, we have never seen it with our own eyes and have only come in contact with it while drilling (and you know you hit a roll-over bar when you snap a drill bit). What we quickly discovered was that the wiring for the lights was tucked under that bar through some small hole and in order for us to get through we need to get our wire through not two of those openings (if you look on the right at the previous photo those opening are exactly behind the old seat numbers and we had to fish a wire through from one light to another). And not once, but 5 (!) times - one of them involving an even more daring feat of drilling a new hole in that side panel (only 1 in in diameter unlike the light fixture holes that are 6in) and trying to hit that from about 4 feet away. The process was very humbling and reminded me of apes fishing for termites on the planes of Africa.
Now, we also have made some serious progress in the area of walls.
It took a lot of cut-outs to match the shape of the Gillig roof


And here are a couple more shots taken after some more walls were cut and fitted


The darkroom, as well, is starting to finally take shape. First a lot of jig-saw action was needed to make frames to fit each window (and, no, they are not identical, they probably were in 1978, but now every one had to be fitted individually with a lot of patience and finesse)


Here is something else though that I forgot to mention. As one might imagine the Bus was pretty dirty so is was due for a deep cleaning. The ceiling was easy enough (though it took me about 3 hours of spraying up and breathing the 409 fumes), but the chrome was more than I could handle.
I mean look at that


Oh, and the last of the walls was put up - it will house the space heater, have a little table for drinks and whatnot and, most importantly, will provide a light-trap and a place for the front darkroom curtain

Well, I think that almost does it for construction. Table tops are ready for pick-up, counter doors are drying in the garage ad the cushions will be ready this week. Home Depot screwed us over and delayed the shipping of out flooring, so we will install it on the 3rd of May.
I do have some new developments in our plan to share with You, but it's already 3:30 am and I better hit the hay - tomorrow is a big day, possibly our last day parked at Ryan's place.
Good night.
AO
No comments:
Post a Comment